Note
- This tutorial is for those who want to install the Python data analysis library called Pandas on a Windows machine.
- 🔥 Free Pandas Course: It includes group access, a bonus workshop, and weekly tutorials—all at no cost.
Before we write any Pandas code, I am going to show you how to install the Jupyter Notebook and all of the Python libraries you will need to get started. We will also cover certain topics on how to manage your Python installation. Let’s get started!
- Jupyter Notebook - is an interactive computing environment that combines coding, analysis, and documentation all in one place. This is the software we will be using in this course to write code with.
- Python libraries - In this tutorial, I’ll guide you through the most efficient way to install Pandas, along with other essential libraries you’ll likely need for data analysis.
About the Author, David
If you are curious on knowing the person who put this Pandas tutorial together ( totally optional ), here is a little about me.
- I have over 17+ years in tech
- I have been using Pandas since 2013
- My Pandas tutorials have received over 455,200 views and have been consumed for a total of 14,300+ hours!
- I have written 48+ Pandas articles on Linkedin!

Install Anaconda
Note: Yes, this will install Pandas for you.
As I mentioned earlier, the first step is to get your Python environment all squared away. I will then briefly go over the Jupyter Notebook so you have a basic idea on how to use the tool. There is actually a lot you can do with it and at the same time it is simple enough for a beginner. We will go over the basics (just show me how to run some code) and go from there.
So how are we going to install Python on our laptop? Well, we are going to do this by installing a software called Anaconda. This software is open source (which means it is free) and it will install Python and a bunch of Python libraries along with it. It also has the ability to add, remove, or update Python libraries as needed. Why is this important? This means we can install new libraries or we can remove any libraries we do not want from our computer. If a new version of Python is released, Anaconda can help you update the version of Python installed on your computer to the latest version that is available.
Why can’t we just install Python 3 and ignore Anaconda?
You can always do that, but trust me, it is much easier to get Python installed and keep it up to date using Anaconda. If you are still not convinced, keep reading.
The first step in the process is to delete any version of Python you might have already installed on your computer. If you are in this situation, please un-install Python and restart your computer.
Install Pandas Video
The video below will walk you through all the steps you need to get Anaconda installed on your machine. If you prefer to follow a written guide, I have one ready for you right below this video.
Written guide to Install Anaconda:
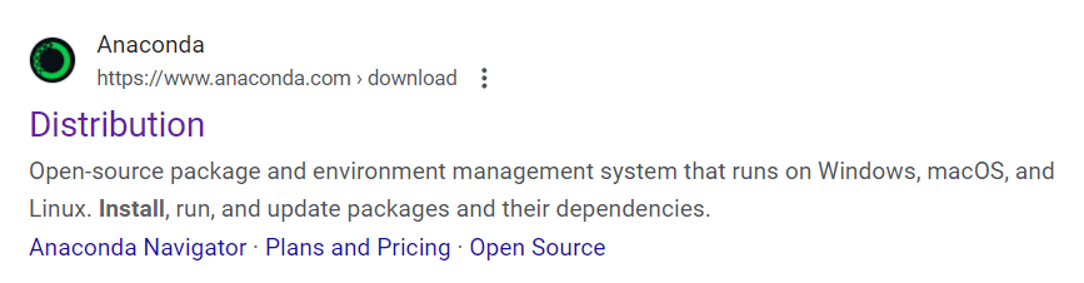
Please navigate to www.google.com and search for the word “install anaconda” as shown in the figure below.

You then want to find a link similar to the one in the figure below.
The download page will have three options depending on your operating system. You will find one for Windows, one for Apple (OS X), and one for Linux. For this course, we will be installing the Windows version.
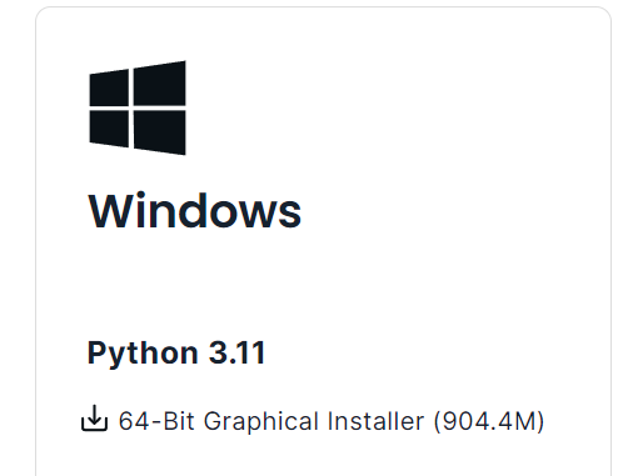
Click on the 64-Bit Graphical Installer link to begin the download. After you have downloaded the Anaconda installer you should get a file that looks like the one in the figure below.
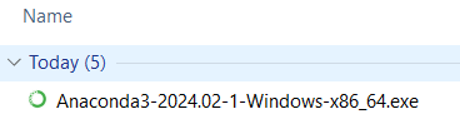
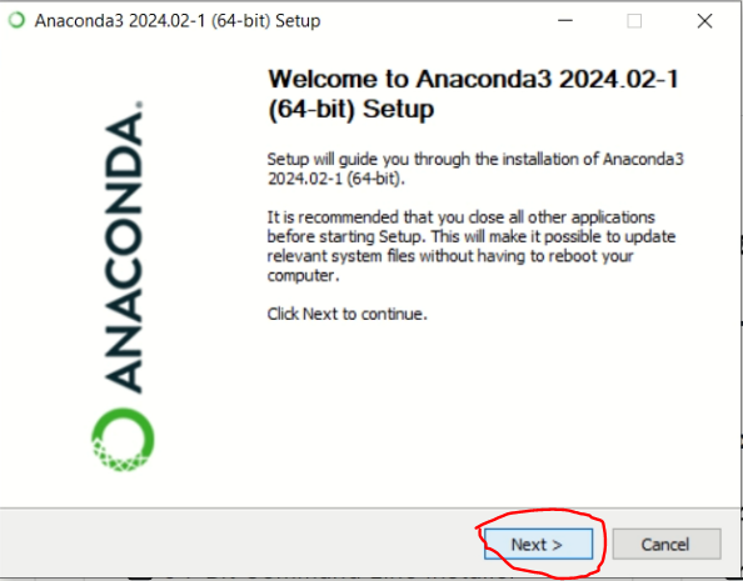
Double-click on the Anaconda3-2024.02-1-Windows-x86_64.exe file to start the installation process. You will then get the dialog box as shown below. Press the Next button to continue.
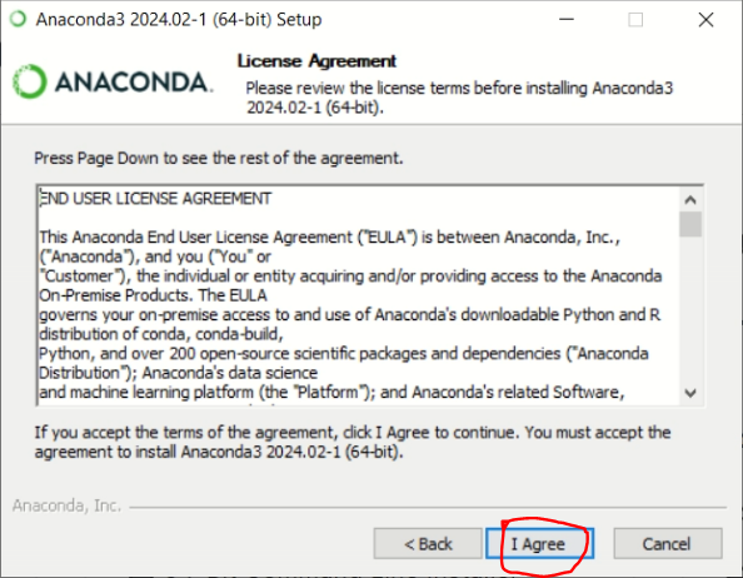
The next dialog box will mention the License Agreement you will need to agree with in order to continue. Please select the I Agree button as shown below.
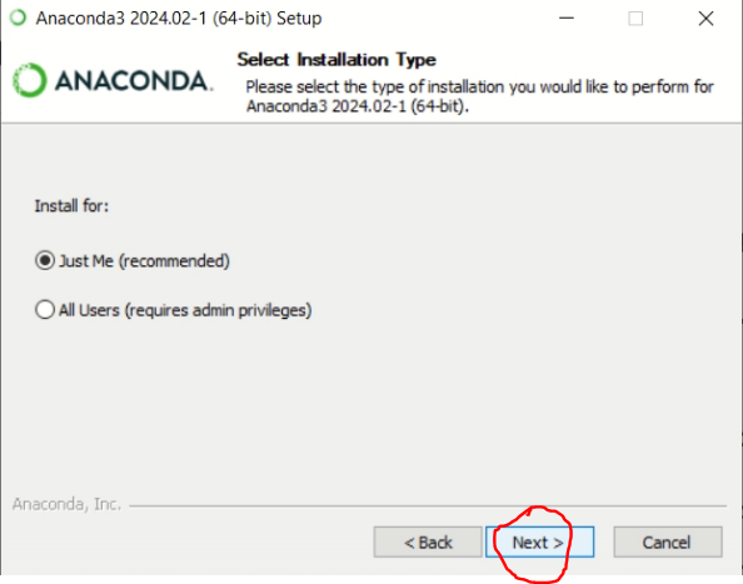
The next dialog box will ask you to select the installation type. I would go with the recommended option and press the Next button as shown below.
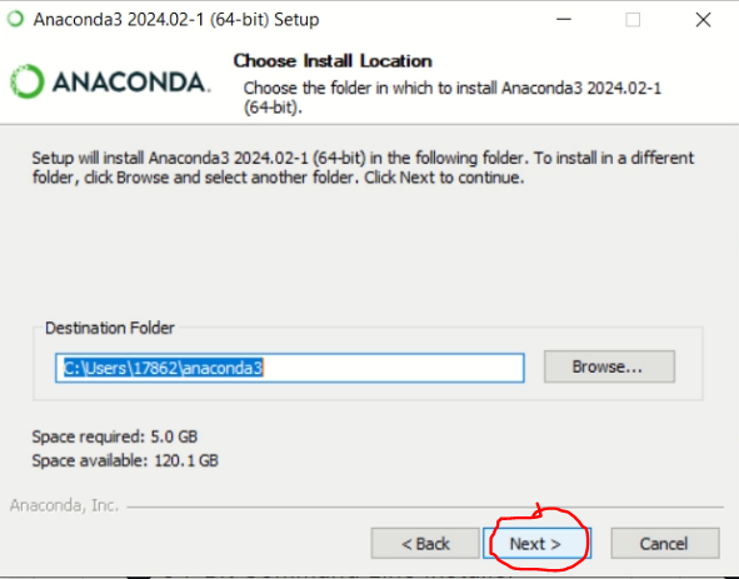
The next dialog box will ask you to choose the installation location. I would go with the recommended destination folder and press the Next button as shown below.
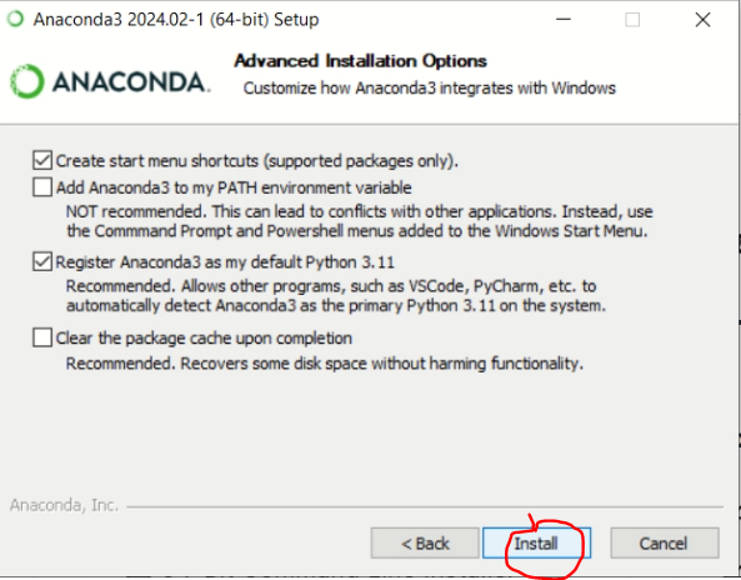
The next dialog box will ask you to choose advanced installation options. I would go with the default selections and press the Install button as shown below.
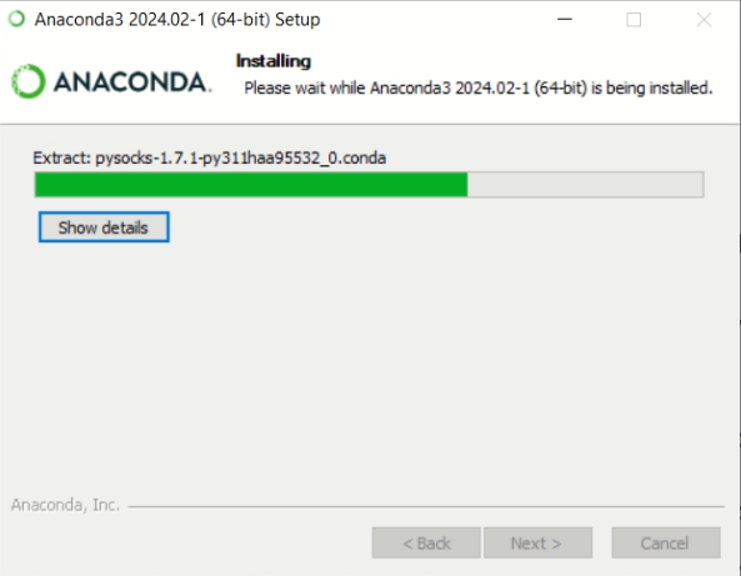
As the installation is in progress, you will get a dialog box similar to the one below. This usually can take up to 10 minutes to complete the installation.
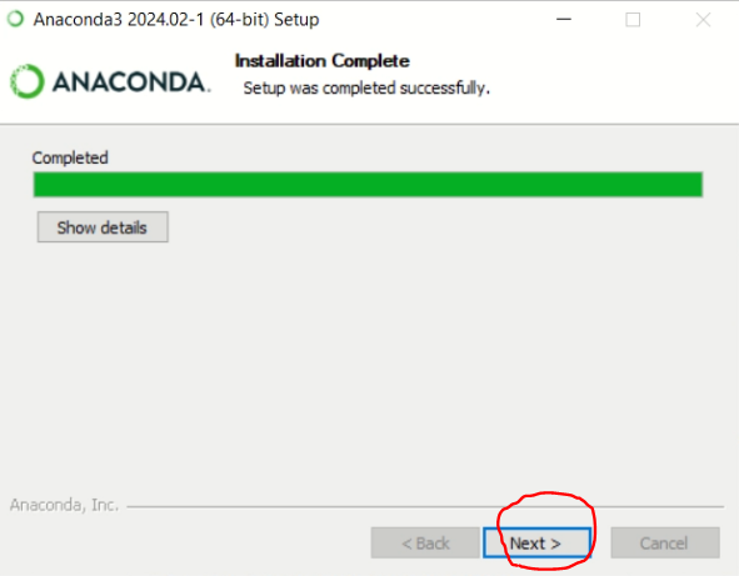
After the installation of Anaconda is complete, press the Next button as shown below.
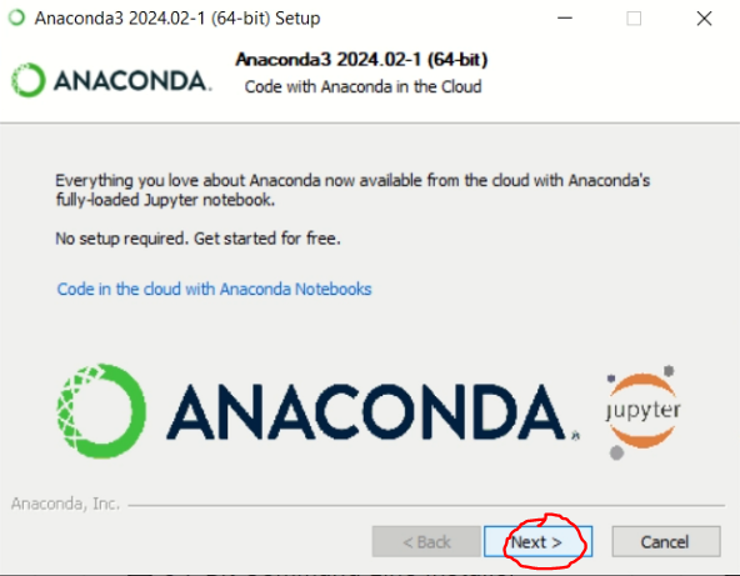
Select Next button once more.
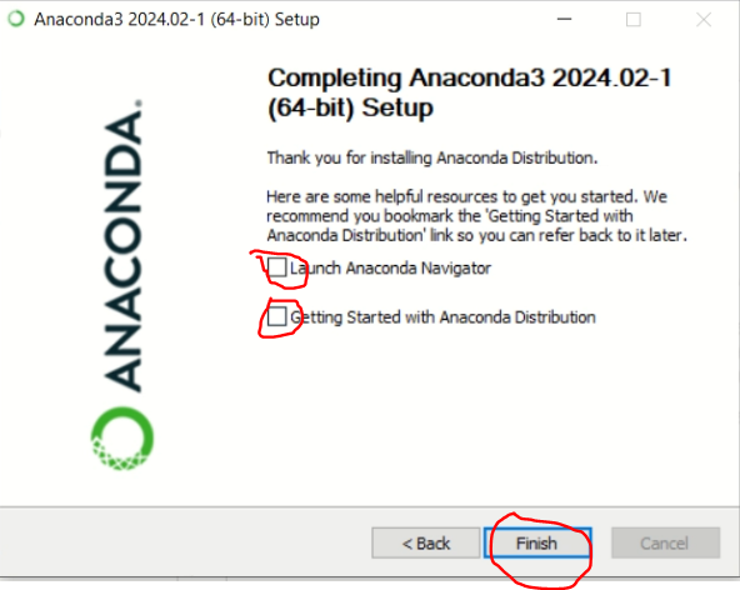
Congratulations! Give yourself a pat on the back. You have just installed Python 3, Pandas, Jupyterlab, and a whole load of other popular Python libraries.
Uncheck both options and press the Finish button to complete the installation as shown below.
Verify Installation
Let’s verify we have installed Anaconda successfully and that all of the files and folders are where they should be. Click on the Windows button and select All Programs. You will then see a new item in your menu called Anaconda3 (64-bit). Expand the folder to verify you have a list of similar programs under the Anaconda3 (64-bit) folder as shown below.
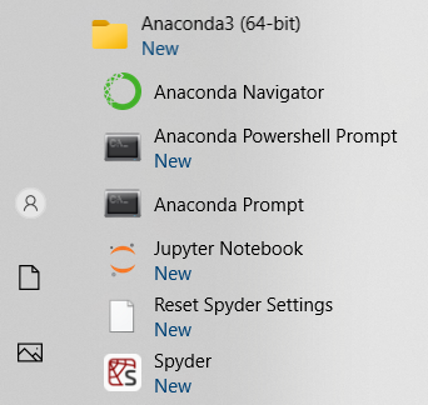
You can go ahead and explore any of these shortcuts, but we will start with the shortcut named Anaconda Prompt.
The Anaconda Prompt
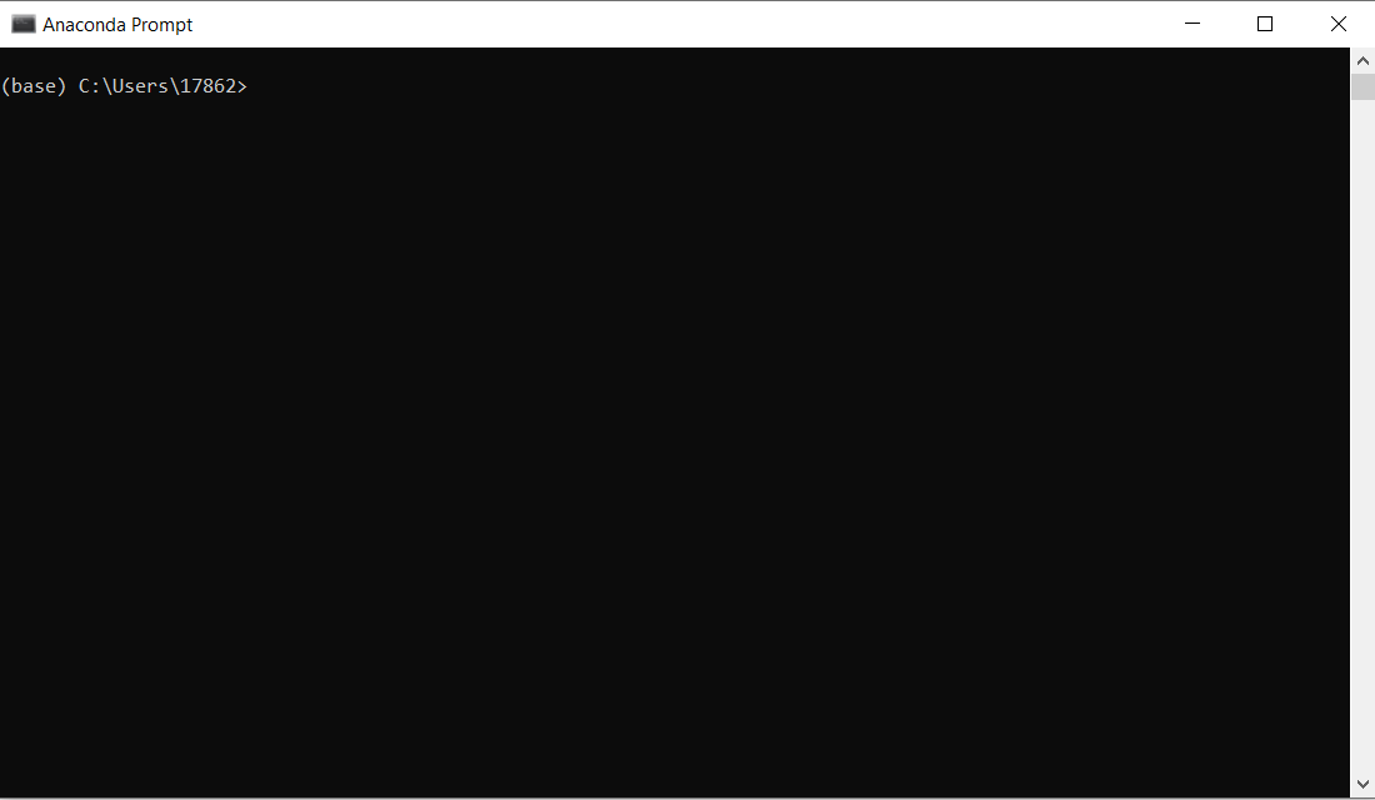
What is the Anaconda Prompt? This is the command line tool that we will be using to manage our Python installation. It’s simple to use, I promise. Click the Anaconda shortcut and when it opens, you will get a similar black window as shown below.
Updating Conda
Are you still with me? Make sure you keep the Anaconda Prompt open as we will be using it shortly. What is Conda and what happened to Anaconda? Anaconda is the software we just installed that includes Conda. Conda is a program that lets us manage our Python libraries. It’s understandable if this is starting to get a little confusing, but you will also see that it is not that bad.
With the Anaconda Prompt open, type conda update conda and press the enter key on your keyboard as shown in the figure below.

After you press the enter button, you will get a message similar to the one below.
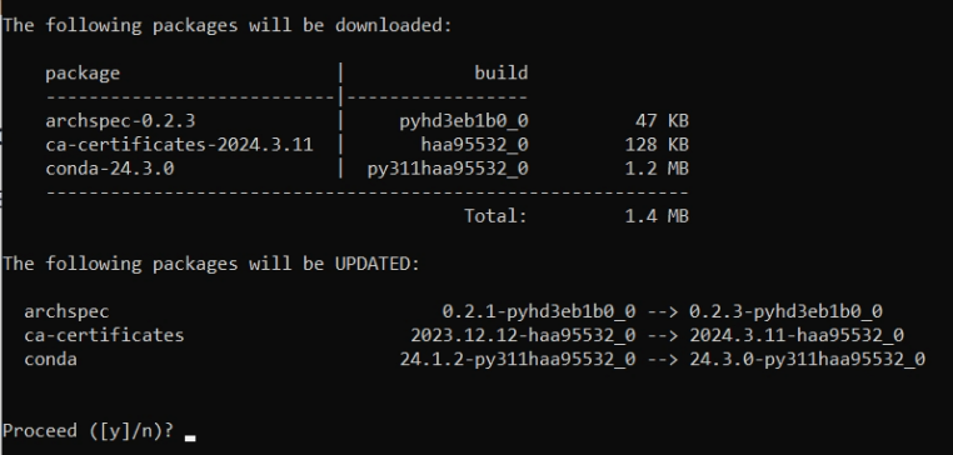
What does conda update conda do? We start with conda to let the Anaconda Prompt know we want to use the Conda software. We then type update to tell Conda we want to update something. So the code simply means we want to update the conda software.
How to interpret the messy output that Conda gives us?

Let’s decode this box…
Left side of the arrow:
- Tells you what version of the Python library or software you have. The right side of the arrow:
- Tells you the version Conda wants to upgrade to.
For example, we have Conda version 24.1.2 and Conda wants to upgrade to version 24.3.0, get it? Don’t worry too much at this point if it doesn’t all make sense to you just yet. Just realize that Conda is telling you what you currently have installed and what it plans to update to.
Press y and then enter to accept the proposed upgrades and Conda will start the installation of the new versions of the packages listed on your screen. You will immediately start to see Conda download the new versions of the programs as shown below.

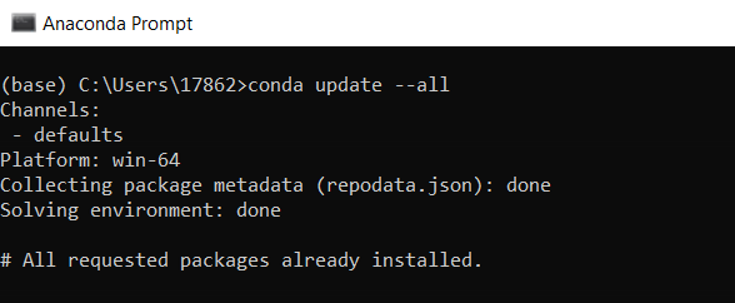
As you can see, if Conda does not find any new version of a Python library you have installed, it will return a similar message as shown in the figure below.
Let’s recap what we have done and why we did what we did: We downloaded the Anaconda software and installed it on our computer. We then opened the Anaconda Prompt and executed the following commands.
conda update conda
conda update --all
These two commands are executed for the purpose of making sure we have the latest versions of the software we just installed. The first command will check to see if there are any new versions of Conda (the software that lets us manage our Python installation), Python, and several other programs. The second command will only look at our installed Python libraries and check to see if any of them can be updated.
As I mentioned earlier, I tend to run these commands about once a month.
How do I install individual Python libraries? Let’s try to update the Python library called Pandas (you should already be familiar with the name).
In the Command Prompt type conda update pandas and press the enter button as shown below. This command will check to see if there are any newer versions of the Pandas library available.
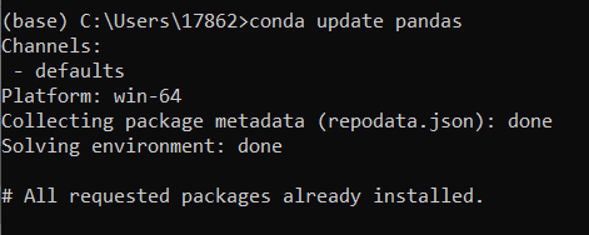
As you can see we currently have the latest version of Pandas installed.
Some Practice: Try the following commands and upgrade several more packages on your own. Go ahead, don’t be shy. Don’t worry about what each of the packages means, we are just practicing here.
conda update numpy
conda update ipython
conda update jupyter
conda update matplotlib
conda update tornado
How do I install Python libraries that Conda cannot install? Sometimes there are Python libraries that exist, but Conda is not aware of them. Unfortunately if Conda does not know they exist then you won’t be able to install them using the install keyword. For these rare situations you can use the commands below.
pip install [pkg name]Deleting Python Libraries Deleting Python libraries you no longer want or need is really easy with Anaconda. Let’s assume we want to delete the Pandas library. How do we do it? Well, just type conda remove pandas and press enter. The keyword we need to use to remove or delete installed Python libraries is called remove.
Word of caution: Conda will also remove any package that depends on any of the specified packages as well. This means not only will Pandas be removed, but any other package that depends on Pandas. Conda does this to ensure all your packages work. The downside is that, things that used to work may stop working. This to be honest is a bit annoying.
Instead we are going to add a flag to the command to ensure we don’t break anything. Type the command below and press enter. The force flag will skip dependency checking and remove just the requested packages.
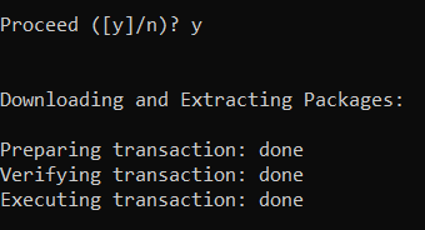
conda remove pandas --forceGo ahead and say yes and you should get a message similar to the one in the figure below.
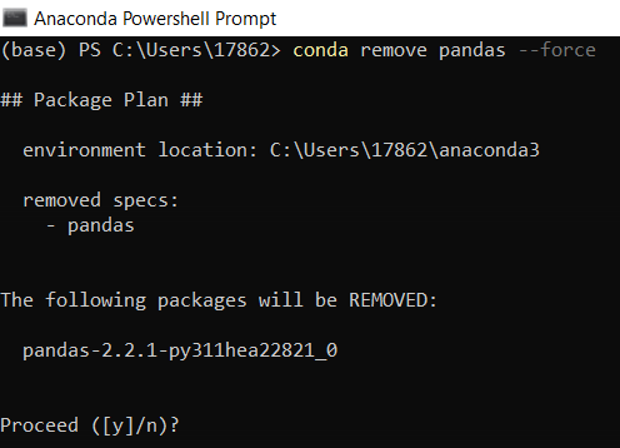
Conda will then ask you to confirm your request to delete Pandas by typing y and pressing the Enter Button on your keyboard.
Pretty easy. You have officially removed Pandas from your machine. The good news is that to reinstall Pandas, we just need to execute one simple command. Let’s do just that.
In the Anaconda Prompt, type conda install pandas and press the Enter key on your keyboard as shown below.
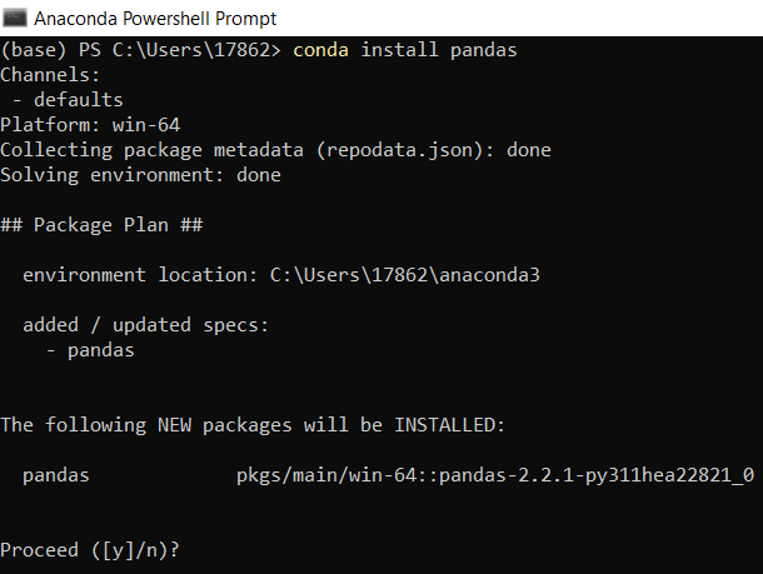
Press y and then press Enter on your keyboard to accept the installation of Pandas. That’s is it, you now have Pandas once again!
To verify you have Pandas installed, run the following command.
conda list pandas
As you can see from the image above, I have Pandas version 2.2.1 installed locally.
If for some reason Conda did not install back some of the libraries it deleted, please run the following command to add them all back.
conda install anacondaThis command will install the latest Anaconda distribution and hopefully reinstall your missing packages. If this fails, I recommend you reinstall Anaconda from scratch.
Cheat Sheet
Try each one of these, they will save you time, hard drive space and make you look really cool.
- How to update Anaconda?
conda update conda
conda update --all- How do I update an existing package?
conda update [pkg name]- How do I install additional packages?
conda install [pkg name]
conda install [pkg name]=version], for example: conda install pandas=0.12- How to remove an existing package?
conda remove [pkg name]- How to remove old packages that are not being used?
conda clean -p
conda clean –t- How to get a list of installed packages in a Conda environment?
conda listNote that if you installed a package outside of Anaconda, it probably won’t show up on the list.
PIP
Sometimes you may not be able to install a package using Anaconda and may have to fall back on pip.
- How do I update an existing package?
pip install --upgrade [pkg name]- How do I install packages?
pip install [pkg name]- How to remove an existing package?
pip uninstall [pkg name]- How to get a list of installed packages?
pip listSummary
That was a lot of good information! The most important thing we learned was how to get Python installed on your machine. You may not be comfortable using the terminal just yet but as we have seen, the Anaconda Prompt is your friend. I hope at this point, I have convinced you that Anaconda is amazing and you don’t ever have to worry about getting Python up and running in the future. We went through several Conda examples showing you how to install, delete, and update Python libraries. And if that wasn’t enough, the end of this lesson gave you a Cheat Sheet in case you ever need a refresher. I hope the information was clear and at a level that even someone with a zero programming background can follow.
PANDAS HOME PAGE