For a Brand New Adapter:
- Start and log into Kali
- Plug in Wireless Adapter
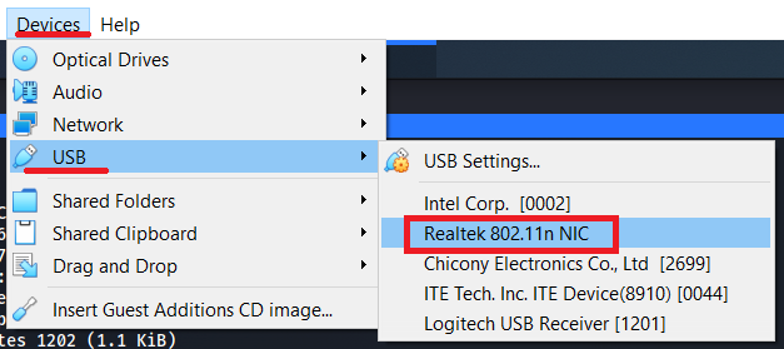
- Devices > USB > Realtek 802.11n NIC
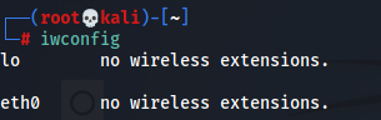
- iwconfig
- If you cannot see the wireless adapter (no wlan) as shown below
Fix wifi adapter not being recognized by Kali:
sudo apt update
sudo apt upgrade
sudo apt dist-upgrade -y
sudo reboot now
Here are the current usb drivers used and it shows you the chipset:
─$ lsusb
Bus 001 Device 003: ID 0bda:8812 Realtek Semiconductor Corp. RTL8812AU 802.11a/b/g/n/ac 2T2R DB WLAN Adapter

sudo apt install realtek-rtl88xxau-dkms
sudo apt install dkms
git clone https://github.com/aircrack-ng/rtl8812au
cd rtl8812au/
make
sudo make install
iwconfig
Note: if iwconfig does not show you the wifi adapter, unplug and plug usb adaptor again
For an Adapter that you have previously Setup:
-
Start and log into Kali
-
Plug in Wireless Adapter
-
Devices > USB > Realtek 802.11n NIC
-
ifconfig & iwconfig
- you should see wlan0
- Adapter will be in managed mode
- MAC address of adapter will reset to factory one
-
Change MAC adddress
- first disable the interface
- ifconfig wlan0 down
- ifconfig wlan0 hw ether 00:11:22:33:44:55
- enable the interface
- ifconfig wlan0 up
- ifconfig
- you may have to try the steps a few times to get it to work
- first disable the interface
-
Change to monitor mode:
- mode=managed, the default setting
- Only packets with its destination MAC Address that match the wifi adapter are captured
- ifconfig wlan0 down
- Run this command to fix any potential issues (not required)
- airmon-ng check kill
- enable monitor mode
- iwconfig wlan0 mode monitor
- as an alternative
- airmon-ng start wlan0
- ifconfig wlan0 up
- iwconfig
-
If you can see the wlan adaptor and place it into monitor mode, but cannot actually scan:
- reinstalling the drivers and restarting network manager fixed this issue for me
sudo apt remove realtek-rtl88xxau-dkms
sudo apt install realtek-rtl88xxau-dkms
sudo service NetworkManager restart
iwconfig