Installation
I am going to install everything inside my wsl Kali Linux image
- Install docker
sudo apt update
sudo apt install -y docker.io
docker -v- Install containerlab
bash -c "$(curl -sL https://get.containerlab.dev)"- To upgrade
sudo -E containerlab version upgradeCreate yml file
- Create folder named clab
mkdir ~/clab
cd clab- Create file named apline.clab.yml
touch apline.clab.yml
vim apline.clab.yml
I had to manually type the info in then ESC shift+ZZ to save and exit
name: apline_connect

topology:
  kinds:
    linux:
      image: alpine:latest
  nodes:
    alpine1:
      kind: linux
    alpine2:
      kind: linux

  links:
    - endpoints: ["alpine1:eth1", "alpine2:eth1"]
Running containerlab
sudo containerlab deploy --topo apline.clab.ymlUnfortunately I got:
└─$ sudo containerlab deploy --topo apline.clab.yml
INFO[0000] Containerlab v0.49.0 started
INFO[0000] Parsing & checking topology file: apline.clab.yml
Error: Cannot connect to the Docker daemon at unix:///var/run/docker.sock. Is the docker daemon running?- Since I am running Kali in WSL
curl -L https://gist.githubusercontent.com/hellt/e8095c1719a3ea0051165ff282d2b62a/raw/1dffb71d0495bb2be953c489cd06a25656d974a4/docker-install.sh | \ [](https://containerlab.dev/install/#__codelineno-11-2)bash

sudo service docker start- Trying containerlab again
└─$ sudo containerlab deploy --topo apline.clab.yml
INFO[0000] Containerlab v0.49.0 started
INFO[0000] Parsing & checking topology file: apline.clab.yml
INFO[0000] Could not read docker config: open /root/.docker/config.json: no such file or directory
INFO[0000] Pulling docker.io/library/alpine:latest Docker image
INFO[0001] Done pulling docker.io/library/alpine:latest
WARN[0001] Unable to init module loader: stat /lib/modules/5.15.133.1-microsoft-standard-WSL2/modules.dep: no such file or directory. Skipping...
INFO[0001] Creating lab directory: /home/kali/clab/clab-apline_connect
INFO[0002] Creating container: "alpine2"
INFO[0002] Creating container: "alpine1"
INFO[0003] Creating link: alpine1:eth1 <--> alpine2:eth1
INFO[0003] Adding containerlab host entries to /etc/hosts file
INFO[0003] Adding ssh config for containerlab nodes| # | Name | Container ID | Image | Kind | State | IPv4 Address | IPv6 Address |
|---|---|---|---|---|---|---|---|
| 1 | clab-apline_connect-alpine1 | c23e6177f93d | alpine:latest | linux | running | 172.20.20.3/24 | 2001:172:20:20::3/64 |
| 2 | clab-apline_connect-alpine2 | 36699476f882 | alpine:latest | linux | running | 172.20.20.2/24 | 2001:172:20:20::2/64 |
Connecting to endpoints
I was not able to log into the Alpines images. I needed to add the Kali user to the docker group.
sudo usermod -aG docker $USER
exit
Once I reopened Kali, the containerlab was still up and I was now part of the Docker group.
┌──(kali㉿LAPTOP-AF9MIU0S)-[~]
└─$ groups
kali adm cdrom sudo dip plugdev users docker
Now I was able to connect to each alpine machine.
┌──(kali㉿LAPTOP-AF9MIU0S)-[~/clab]
└─$ docker exec -it clab-apline_connect-alpine1 sh

/ # whoami
root

┌──(kali㉿LAPTOP-AF9MIU0S)-[~/clab]
└─$ docker exec -it clab-apline_connect-alpine2 sh

/ # whoami
root
I have internet access and can ping the other alpine image. Amazing!
┌──(kali㉿LAPTOP-AF9MIU0S)-[~/clab]
└─$ docker exec -it clab-apline_connect-alpine2 sh
/ # whoami
root
/ # ping 8.8.8.8
PING 8.8.8.8 (8.8.8.8): 56 data bytes
64 bytes from 8.8.8.8: seq=0 ttl=55 time=28.917 ms
64 bytes from 8.8.8.8: seq=1 ttl=55 time=27.977 ms
^C
--- 8.8.8.8 ping statistics ---
2 packets transmitted, 2 packets received, 0% packet loss
round-trip min/avg/max = 27.977/28.447/28.917 ms
/ #
/ #
/ # ping 172.20.20.3
PING 172.20.20.3 (172.20.20.3): 56 data bytes
64 bytes from 172.20.20.3: seq=0 ttl=64 time=0.217 ms
64 bytes from 172.20.20.3: seq=1 ttl=64 time=0.143 ms
^C
--- 172.20.20.3 ping statistics ---
2 packets transmitted, 2 packets received, 0% packet loss
round-trip min/avg/max = 0.143/0.180/0.217 ms
Connecting to the outside world
The host and all the images in the network can ping each other. This is built in out of the box with Containerlab. If you wanted your lab to be available to the internet, I suggest you use zerotier.
- Install zerotier on node you want to access via the internet
- Install zerotier on a jump node you can access via the internet
- jump node - an image that is only used to access the other images it has access to
- i.e. you would connect via ssh to the jump node and then ssh into anoy other node in the lan
Let’s go through an example: The only steps I am missing here is installing and setting up zerotier.
yaml
In this example we will use the zero1 node as our jump node. Zero1 will have access to alpine1 and kali1.
└─$ cat apline.clab.yml
name: apline_connect

topology:
  nodes:
    alpine1:
      kind: linux
      image: alpine:latest
    kali1:
      kind: linux
      image: kalilinux/kali-rolling
    zero1:
      kind: linux
      image: zerotier/zerotier

  links:
    - endpoints: ["alpine1:eth1", "kali1:eth1"]
create the network
└─$ sudo containerlab deploy --topo apline.clab.yml| Name | IPv4 Address |
|---|---|
| clab-apline_connect-alpine1 | 172.20.20.2/24 |
| clab-apline_connect-kali1 | 172.20.20.3/24 |
| clab-apline_connect-zero1 | 172.20.20.4/24 |
Connect to my personal zerotier network
We need to shell into zero1 and connect to our zerotier network.
Note: replace NETWORK_ID with your real number
docker exec -it clab-apline_connect-zero1 sh
zerotier-cli join NETWORK_ID
When you successfully joined, you will see: 200 join OK
Now log into zerotier, and make sure you allow your node into the network. I would label the machine “containerlab” so you know what this ip points to. To allow the node into your network, simply select the checkbox at the left and you are in!

The IP that zerotier gave me for the zero1 node is 10.147.17.242
Install ssh
Now that we are in zero1, we need to install ssh (port=22) so we have a way to shell into this node via another computer.
apt-get install openssh-server
service ssh start
Now that we have enabled ssh, we need to create a user and a password. After you create a new user, it should prompt you to add a password.
adduser USER_NAME_GOES_HEREConnect to your network via the internet
Remember that the IP address that is available via the internet is 107.13.68.216. But only the approved machines in the zerotier network have access to zero1.
My personal Windows machine is part of my zerotier network, so let’s try to ssh into it.
PS C:\Users\17862> ssh 10.147.17.242
The authenticity of host '10.147.17.242 (10.147.17.242)' can't be established.
ECDSA key fingerprint is SHA256:wWejrpZbMn+Ri+UfRblf/4Siocs6EvijMavXvfyune8.
Are you sure you want to continue connecting (yes/no/[fingerprint])? yes
Warning: Permanently added '10.147.17.242' (ECDSA) to the list of known hosts.
david@10.147.17.242's password:
Linux zero1 5.15.133.1-microsoft-standard-WSL2 #1 SMP Thu Oct 5 21:02:42 UTC 2023 x86_64

The programs included with the Debian GNU/Linux system are free software;
the exact distribution terms for each program are described in the
individual files in /usr/share/doc/*/copyright.

Debian GNU/Linux comes with ABSOLUTELY NO WARRANTY, to the extent
permitted by applicable law.
david@zero1:~$
Success!
Now let me show you that I can ping the other two nodes in the containerlab network.
david@zero1:~$ ping 172.20.20.2
PING 172.20.20.2 (172.20.20.2) 56(84) bytes of data.
64 bytes from 172.20.20.2: icmp_seq=1 ttl=64 time=1.08 ms
64 bytes from 172.20.20.2: icmp_seq=2 ttl=64 time=0.101 ms
^C
--- 172.20.20.2 ping statistics ---
2 packets transmitted, 2 received, 0% packet loss, time 1002ms
rtt min/avg/max/mdev = 0.101/0.591/1.081/0.490 ms
david@zero1:~$ ping 172.20.20.3
PING 172.20.20.3 (172.20.20.3) 56(84) bytes of data.
64 bytes from 172.20.20.3: icmp_seq=1 ttl=64 time=0.204 ms
64 bytes from 172.20.20.3: icmp_seq=2 ttl=64 time=0.100 ms
^C
--- 172.20.20.3 ping statistics ---
2 packets transmitted, 2 received, 0% packet loss, time 1071ms
rtt min/avg/max/mdev = 0.100/0.152/0.204/0.052 ms
This means if I setup ssh in the kali1 or alpine1 nodes, I can log into those machines. This makes it pretty easy to move around the network. Of course, the best part is that I can reach my homelab from the internet.
Commands
- See a summary of the network
sudo containerlab inspect- see a visual summary of the topology
- Open browser in Windows machine
sudo containerlab graph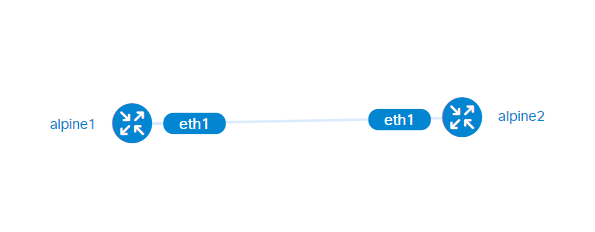
- destroying a lab
sudo containerlab destroy --topo apline.clab.yml- upgrade containerlab
sudo containerlab version upgradeUse cases
- Connect all images directly to host IP
name: alpine_connect

topology:
  nodes:
    alpine1:
      kind: linux
      image: alpine:latest
network-mode: host- Expose a specific port to host IP
name: apline_connect

topology:
  nodes:
    alpine1:
      kind: linux
      image: zerotier/zerotier
      ports:
- 8888:22- Failed MACVLAN attempt (will not work with WSL2)
name: alpine_connect

topology:
  nodes:
    alpine1:
      kind: linux
      image: alpine:latest

  links:
    - type: macvlan
      endpoint:
        node: alpine1
        interface: eth1
host-interface: eth0- Connect to all docker instances via Apache Guacamole
- You first need a user-mapping.xml file
- Depending on what you add to the network, you will have to update this file
- Yes, this is not secure, user beware
- You first need a user-mapping.xml file
<user-mapping>

    <!-- Per-user authentication and config information -->
    <authorize username="USERNAME" password="PASSWORD">
        <protocol>vnc</protocol>
        <param name="hostname">localhost</param>
        <param name="port">5900</param>
        <param name="password">VNCPASS</param>
    </authorize>

</user-mapping>- Here is the yaml
- Note you need both the guacd and guacamole images
- The binds section just maps the file located locally to the directory in the guacamole image
- We also need to set the GUACAMOLE_HOME environment variable to make this work
- I had to set the GUACD_HOSTNAME after I deployed the network, but the good news is that every time I deploy it, the ip numbers stay the same.
name: guacamole_topo

topology:
    nodes:
      guacamole:
        kind: linux
        image: guacamole/guacamole
        binds:
          - user-mapping.xml:/etc/guacamole/user-mapping.xml
        env:
          GUACD_HOSTNAME: 172.20.20.2
          GUACAMOLE_HOME: /etc/guacamole
        ports:
          - 8080:8080
      guacd:
        kind: linux
        image: guacamole/guacd
        ports:
          - 4822:4822